Thursday, 25 October 2012

Vampy lips : Halloween makeup ideas

Heres a quick and easy way to get those gorgeous vampy lips for halloween!


I think these lips are so stunning and so in for fall season that I would wear these on a normal day too! They scream fashion and glamour...

Step 1


Line your lips using a black lipliner or kohl pencil, if you don't want to go too intense (if you want for everyday) then you can switch this for a dark brown lipliner. I used mac smolder kohl pencil.

Step 2


Fill in the ends of your lips with your choice of pencil

Step 3


Apply a bright red lipstick in the centre of your lips. I used revlon really red matt lipstick.

Step 4


Blend everything together with a lip brush (I used real techniques detailer brush), make sure you blend where the black or brown and red meets and also blending with the lipline. Go back and add some more red if needed

Step 5


Add a bright red lipgloss in the centre of your lips and blend (I used Illamasqua intense lipgloss in temper), go around your lip line with concealor to sharpen it. This is really going to make the lips pop!

Will you be trying this lip? Leave your comments below


Love Always

Xxx

Sanna

Tuesday, 23 October 2012

How to draw fangs! : Halloween makeup ideas

Here is a quick way to change your appearance so you look more Halloweeny!


This is great for when you have no time to dress up for halloween, just pair it with your everyday makeup or add a smokey eye or cat liner to get in the halloween mood! 
This would also work with any outfit! Black top and jeans/skirt? Your DONE! 

You will need

-Black kohl pencil or gel/liquid liner
-White eyeshadow/kohl pencil 
-Red lipliner
-Red lipstick
-Fake blood! (although this is optional)

Products used
-No7 15 fire lipliner
-Revlon really red matt lipstick
-Mac smolder kohl pencil
-Illamasqua intrigue blush
-Fake blood 

1. Line your lips using a red lipliner, try and make your cupids bow more sharp than it usually is

2. Fill your lips in using a bright red lipstick (or you can go more vampy by using a dark red or black lipstick)

3. Draw the outline of your fangs using your black pencil or gel liner, do this on each side. Start by drawing curves on both sides till they meet at a point. 

4. Fill the fangs in using white kohl pencil or white shadow

5. Add your blood to the corners of your mouth and the end of your fangs

6. Add a bright red gloss on top or red glitter for that bit extra!

Guaranteed to make you look more halloweeny!


DRAG : Halloween makeup ideas

Hey Blog readers/followers! 

Im so sorry, I havn't blogged in a while because I have been so busy! I have a few blogposts lined up for you all in the next week or so...

Now on to the halloween looks!
 I have two main looks lined up for you, the first one is drag, and the second vampire/goth look. For these looks I will be explaining how you can achieve them.


The Eyebrows

Now, for this look this is what will take up the most time as you will need to cover them! Using glue or spirit gum/wax whichever you own (I used glue), using a spatula apply on your brow flattening down your brow hair. Don't worry- this washes off so easy your brows won't fall off. Then apply a colour corrector if you own one (something peachy or sammony) or if not just go ahead with applying concealor on your brows, patting for the best coverage. Now we have no brows we need to draw some new ones higher than our original ones, using a matt black shadow (I used urban decay blackout) and a angled brush draw your template of your brow and then fill in (try and make them thin and long which is what drag queens normally have)!

On to the eyes...

Start by applying a eyeshadow base, I used maybelline colour tattoo in eternal gold. Apply this all over your lid.
Then cut your crease using a angled brush and black eyeshadow and go higher than you normally would because remember our brows are higher giving us more lid space. Apply black shadow right where we cut the crease and then blend out. Make the ends of the eyes more dramatic by applying more shadow there so it becomes more elevated.
Apply a gold shimmering eyeshadow on the lid space (I used urban decay half baked) and a white shadow on the brow bone and inner corner (I used Illamasqua intrigue blush)
Using a gel liner, create thick cat liner extending it so it meets your eyebrow to really give it that drag queen feel.
To finish off the eyes apply black liner in the waterline and black shadow underneath the eyes

 The face

Apply your foundation as usual, but use a thicker coverage. 
Taking a paper or something like that, place it where you would normally contour and using a contour brush sweep the brush down the end of the paper (on your skin) and then brush your contour shade back and forth (I used mac studio fix in nw55
Contour the sides of the nose (quite heavy we want it to be noticeable) and underneath the lip
Highlight the centre of the nose, tops of cheekbones, forehead and chin (I used illamasqua intrigue blush which is a matt white)
For more information on contouring click here 

The lips

Using a brown lipliner a couple of shades darker than your natural skin tone slightly overdraw your lips (I used Illamasqua uncanny)
Highlight your cupids bow either with a shimmering nude eyeshadow or matt white eyeshadow
Fill your lips in with a nude or pinky lipstick (I used mac kinda sexy
Apply a gloss in the middle to give your lips that plumpness and fullness 

REMEMBER- be creative take what bits you want for the looks for example the lips, eyes or cheeks. Whatever you do.. just have fun with it!

What are you going as for Halloween? Leave your comments below


Love Always 

xxx

Sanna

Tuesday, 2 October 2012

Real Techniques Brushes Reveiw!

If any of you watch YouTube makeup tutorials (which I will be starting soon!) you must have heard of the famous duo also known as Pixiwoo.
Sisters, mothers and makeup artists Nicola and Samantha Chapman.


If you don't watch their tutorials you really should! They are so good at teaching makeup and can replicate a celebrity look exactly! I really enjoy watching them both and have been watching them for a really long time even before they were this big. They really have taught me a lot of different techniques of applying makeup and about the basics really, such as skin types, face and eye shapes.

Samantha Chapman launched the brushes Real techniques. Her brushes are amazing quality- at affordable prices. All her brushes provide high definition results and she has tutorials for every single brush to show you how to use it and get the best use out of it.

You can have a browse of all the brushes at www.realtechniques.com
What's even better is if your in the UK they are available in selected Boots  stores and recently I even saw them in Superdrug, so you can have a good look before you spend your pounds!

Out of Sams brushes I own; the core collection, blush brush and stippling brush

THE CORE COLLECTION


RRP- £20.99 for 4 brilliant brushes AND a stand/carry case you can't go wrong!


CLAIMS: 

Create a perfect canvas with this collection of coverage essentials:

    • detailer brush: precision cut to effortlessly conceal problem areas; or, use with lipstick for long-lasting shape and definition
    • pointed foundation brush: Use with liquid foundation to build custom coverage
    • buffing brush: ideal for full coverage application of powder and mineral foundation
    • contour brush: delicately applies highlighter to contour or create sheer, soft-focus finish
    • panoramic brush case is a 2-in-1 case + stand
  • look pixel-perfect even in harsh light
  • ultra-plush, synthetic taklon bristles are hand-cut and 100% cruelty-free
  • extended aluminum handles are light and easy to use

I SAY:

 A brilliant set and lovely stand which is also great when drying your brushes

Detailer brush is great for lips (applying precise colour or blending lip colours together) or even eyeliner-I don't like this brush for concealor because its too small and stiff in my opinion

Pointed foundation brush, now.. let me warn you this is tiny for a foundation brush! However For large areas to conceal it is perfect or for cream blush!

Buffing brush, this brush is AMAZING! You will not regret purchasing this set with this brush in it. It is so soft and dense that it buffs your liquid or powder foundation in beautifully giving a perfect finish. I do prefer this brush with liquid foundation and love how it blends it into my skin so effortlessly and the brush makes it appear like I have hardly nothing on- even when I'm using full coverage foundation! This brush is so easy to use, you just pop your foundation either directly on your brush or on your face and then buff away! This skin is great for applying moisturiser too, because it really lets the product penetrate deep into your skin- but don't worry NO breakouts! Really can't say enough about it, if you have oily, dry, normal or any type of skin and want a pixel perfect finish (even if you don't want full coverage) then this brush is perfect for you.

Contour brush- perfect for contour, allows you to add your contour either naturally or heavily without giving you lines down your face because the brush is so soft and domed it does most of the work for you! I love that this brush is also quite dense- which means it gives you more control over the product you are applying and where you are applying it. For dramatic looks I also use this to contour my nose because of its small domed shape. Again, a really soft brush and a staple in applying my makeup. I NEVER use any other brush than this for contouring! This brush can also be used for highlight and because of its shape it applies it just where you want it so preventing you looking like a glitter ball or over highlighting (which looks wrong to be fair). 

STIPPLING BRUSH

RRP-£11.99- not bad compared to some of Macs prices that give the same effect!
CLAIMS
This dual-fiber brush is the trade secret for creating airbrushed, high-definition results with all types of makeup:
  • look pixel-perfect even in harsh light
  • ultra-plush, synthetic taklon bristles are hand-cut and 100% cruelty-free
  • self-standing for easy storage
  • extended aluminum handle is light and easy to use

I SAY:


This brush is great for stippling on cream or liquid products such as cream blush, liquid or cream foundation. I love how this brush is pink because it looks so nice and feminine. This brush uses up more product that the buffing brush, the hairs on this brush are again really soft and this brush has not shredded on me yet (touch wood)...  I love that I can stand this brush up (like the buffing brush) and I can use it to stipple product on and then buff to give a more natural finish. The brush has a flat surface and this really comes in handy when we want to really press the product into our skin giving it a 'no makeup look'. Again this brush can be used for moisturiser and if your a makeup artist, its amazing on clients with really good skin because this brush allows more control over where we place the product. This brush is easy to clean too and remains to its shape- so we know it will last us!

BLUSH BRUSH


RRP- £9.99 for a brilliant powder brush!

CLAIMS

Contour and define cheeks for flawlessly blended, high-definition results:
  • look pixel-perfect even in harsh light
  • ultra-plush, synthetic taklon bristles are hand-cut and 100% cruelty-free
  • self-standing for easy storage
  • extended aluminum handle is light and easy to use

I SAY:


This brush in my opinion is a little too big for applying blush for me. If you have larger cheek space or cheekbones this will work great as a blush brush. I love using this brush for powder or powder foundation. The great thing is that because the brush is domed, it helps when applying your powder (because sometimes I only want to powder in certain areas) and this helps me achieve that. I use this brush in 2 ways; I swipe it across areas I powder to give me a natural more sheer finish, or i press the brush against my skin in dabbing motions to really press the product into my skin to give me better coverage or stop me getting oily. Its good for light contouring too- I can't imagine this brush for someone who likes heavy blusher or contour so a no no for you. Again a really soft brush, and love how its pink and can stand up on my makeup table when Im getting ready. 

Do you own any Real technique brushes? Leave your mini-reveiws in the comments below!


Love Always 


xxx


Sanna

Sunday, 23 September 2012

Hurry! 15% off Urban Decay

Love Urban decay? 

Get 15% off at www.HQhair.com by typing in the code UD15 at checkout


Official stockists for brands such as NARS, UD, Pixi, GHD, Burts Bees, Decleor, Moroccan oil, Jemma kid and more...

Hurry! Because this code is only valid for 2 days

Grab the famous Naked and Naked 2 palette, Smokey palette, Primer potion, Naked liquid makeup, 24/7 waterproof liquid eyeliner and more all at 15% off with FREE UK delivery!!!


What will you be ordering?


Love Always 


xxx


Sanna

Wednesday, 19 September 2012

Mac inspired triple winged liner


Hey all! Hope your all well...

I was browsing through the mac website & was really inspired by this picture!


I would love to recreate both these makeup looks on a model with similar eyes because my eyes are not the right shape for this look. I tried it and didn't like it so decided to recreate the triple wings but put my own stamp on it by blending a matt brown into the crease and pairing it up with bright red lips.

The lipstick I used was Illamasqua ignite. I wasn't sure if I should go for a retro red lipstick (revlon really red) or a bright orange (illamasqua blaze). I went with ignite because its red with a orange undertone- so I used both colours!


This look was surprisingly very simple (well if you exclude the triple winged liner). If you can't do the triple liner but still love this look, I think it would still look beautiful with just winged liner and liner underneath the eyes, still have a shot at trying it out.

Sanna's top tips for perfect triple winged liner


  • Use a really good brush! Pointed or angled or whatever you work best with really. 
  • You need a steady hand to achieve perfect liner so practise before hand- a good tip if you don't have a steady hand is to rest your elbow on a desk or book (something like that).
  • Use a cotton bud to clean up your line, this will help you get that beautiful long and pointed shape.
  • Use a kohl liner to trace your line first before going over it with your liquid or gel liner so you can prevent mistakes that are hard to get rid of 
  • Dont rush! Do one liner at a time and make sure you leave enough space in between to apply the white eyeshadow.
  • Do your concealor/foundation around your eye area before hand, otherwise it will be really hard to apply it after when all the lines have been completed.


Products used
-Illamasqua rich liquid foundation
-Sleek ultra matt darks palette
-Sleek storm palette (brows)
-Illamasqua ambition blush
-Illamasqua pure pigment in furore
-Maybelline gel liner
-Illamasqua intrigue blush
-Mac studio fix powder nw55 (contour)
-Illamasqua ignite lipstick

What do you think of this triple winged liner look? Will you be trying it out? Leave your thoughts in the comments below!


Love Always 


xxx


Sanna

Saturday, 15 September 2012

Arabic 'flamingo' look


Hey blog followers!

So yesterday I wanted to create a really dark smokey dramatic eye makeup look. I wanted to do a traditional Pakistani bridal look, but lately I have been inspired by all these Arabic makeup pictures so decided to go for that instead.
Revlon colour stay foundation
Illamasqua rich liquid foundation
Illamasqua concealor (underneath eyes)
Collections 2000 lasting perfection concealor (blemishes)
Sleek storm palette (brown for brows, black for eyes,)
Sleek Ultra matt brights palette (hot pink colour & purple, white for brow highlight)
Mac MSF in star wonder (cheeks)
Illamasqua Intrigue blush (inner & outer corner of eyes & sheer face highlight)
Illamasqua drench lipstick
Maybelline gel liner (upper and lower lashline)
I wanted a really dark smokey look with a pop of colour- so I chose black and hot pink. These colours went beautifully together although I should warn you this look takes a lot of blending! But with the help of my Illamasqua blending brush 1 this was no problem.


I also did a creative liner at the bottom by using a flat brush to get a really sharp angle at both ends and then used a pointed brush to perfect the shape. I used a matt white powder at the beginning and ends of my eyes and a lighter concealor underneath my eyes to really enhance the liner.

For this look I wasn't sure if I should do nude or bright lips. I thought because it was such a dramatic makeup look I tried out Illamasqua lipstick in drench- a deep raspberry pink. It really tied everything together!

For the cheeks seeing as everything was so matt, I applied Mac skinfinish in star wonder on my cheeks to give a nice pink glow and add luminosity to the look. I then took Illamasqua intrigue blush (matt white) and sheerly applied this on the tops of my cheekbones, the bridge of my nose, my chin and middle of my forehead as a highlight.


I guess this look would be perfect for that Arabic bridal makeup! Nevertheless, I loved trying this look out and think it would look lovely to a party, wedding or special occasion. I even think this look would look great with the pink substituted for a bronze or gold or any colour really!

What do you all think? Would you wear this look? Leave your thoughts in the comments below


Love Always 


xxx

Sanna 


Monday, 10 September 2012

Get creative with makeup!

I thought today I would make a catch up blogpost on recent looks I have created and sort of inspire you guys out there who love makeup to get arty with it.

Makeup is like face paint! Use your face as a blank canvas and draw your ideas on it. I guarantee you will have so much fun and it will make you realise talent you thought you never had. Your makeup doesn't even have to be neat, as long as you have original ideas and the passion for it-you have already succeeded.

Quick attempt at anime eyes!


Get arty with eyeliner!
Using Illamasqua liquid metal in stoic
Sleek storm palette
Collections 2000 gel liner in teal
Illamasqua powder blush in intrigue

Mac inspired triple liner look
Mac inspired triple winged liner look
Blogpost coming soon!

Fierce eyes!


Vampy lips!
Using...
 Mac smolder eye kohl
Illamasqua Poisen lipstick
Illamasqua Intrigue blush

Michael James inspired gothic tears look!
Instead of a nude lip I wanted to try out vampy

Gothic tears look with a nude lip using Illamasqua hollow cream pigment.

'Winged' creative liner

Do you have any ideas for creative makeup? Leave them and your thoughts in the comments below!


Don't forget to follow me on my facebook page LOOKAMILLION and on twitter @LOOKAMILLION for updates on my looks and inspirations


Love Always 


xxx

Sanna 

Tuesday, 4 September 2012

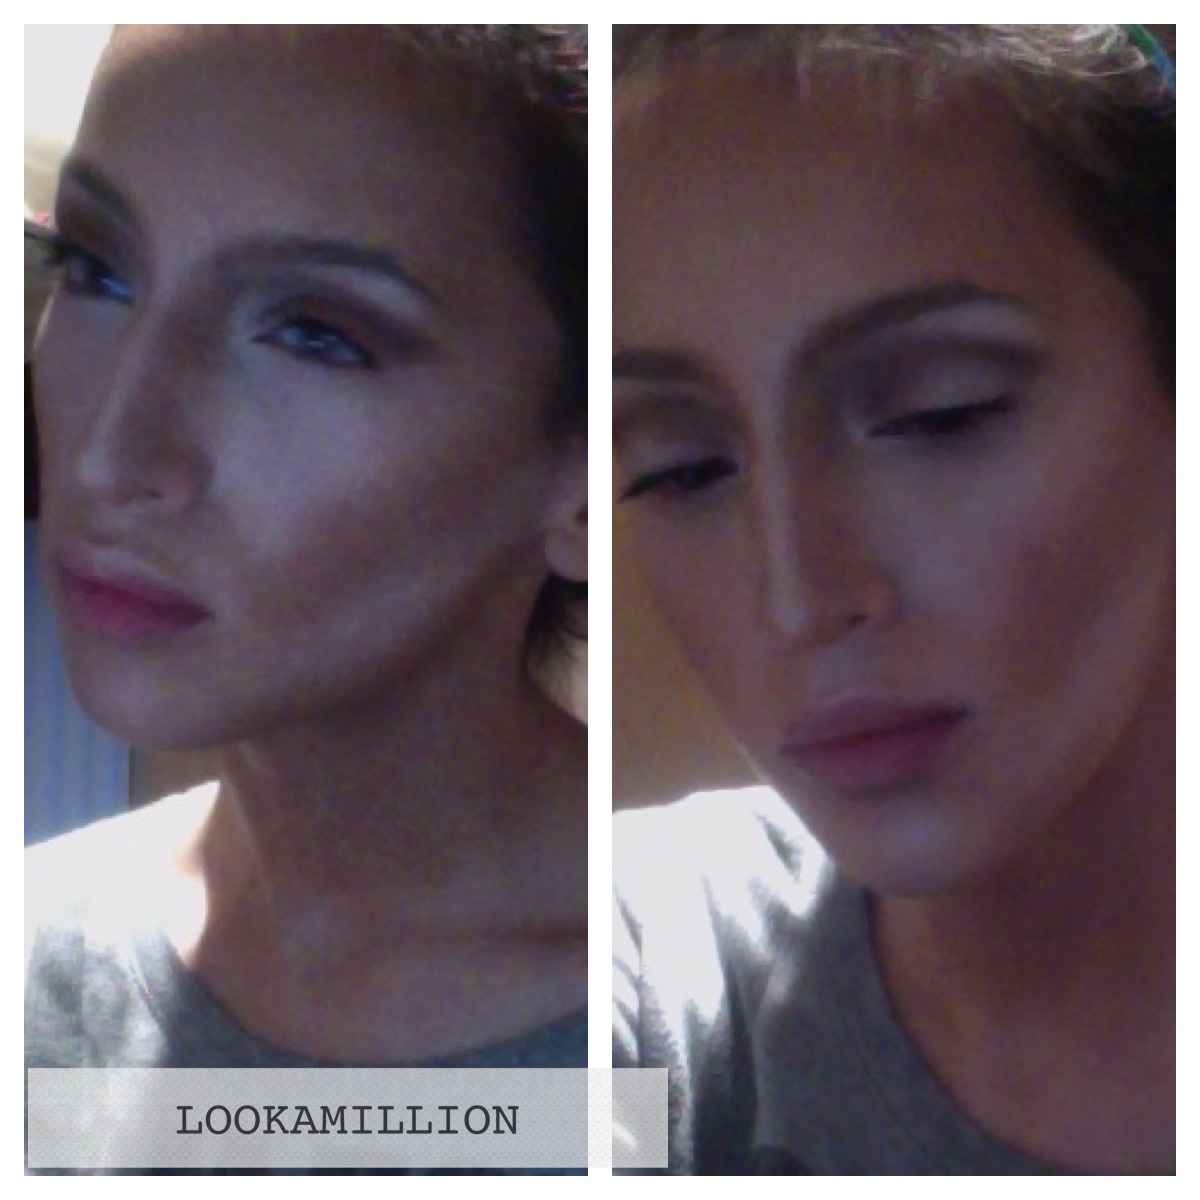
Extreme contouring look and how to contour!

Today I fancied a change to what look I created, so I went for a extreme contouring look that only consisted of using 2 foundations, 2 powders and 1 pigment. This look was so simple and can be worn so naturally but I really amped it up making it look insane! I was inspired to do this look when I was looking through google images on contouring and this one just stood out to me and I really wanted to try it out.

Products Used-
Illamasqua rich liquid in RF140 & RF323
Illamasqua powder blusher in Intrigue
Illamasqua pure pigment in breathe
Mac Nw55 studio fix powder
Bourjois clubbing mascara
This look reminded me of the famous Kim Kardashian contouring method and also catwalk makeup! This heavy contouring looks so crazy up close, but from a distance it looks stunning, making features pop! I did highlighting and contouring but I will cover highlighting in another blogpost.

I have to warn you in advance, contouring is not easy- well maybe for some. I have been doing and practising makeup for ages and I have always found contouring difficult, but now I have mastered it & thought why not share my technique with you all.

So for all you beginners out there here are some questions you may want answering...

What is contouring?

Gives the appearance of a slimmer look, a straighter nose, slender cheeks, larger lid space, prominent cheekbones and even the reduced appearance of a double chin! It can be used for almost anything you want to blank out. It is basically shading our face.


Why do I need it?

I personally don't think anyone needs contouring because everyone looks beautiful natural. You don't always need makeup to make yourself look beautiful. You may want contouring to do anything of the above. Or maybe just to add that extra into your makeup so you can walk out the door feeling confident!

Where should I contour?

Brown colour contour, white is highlight
Sides of the nose, eye socket, underneath the cheekbone (hollows), temples, jawline, underneath bottom lip to create shade so it looks fuller & chin- but remember you don't have to contour in all these places- if you don't need it all, leave it girl!

What products do I need?

To contour you need a matt bronzer or matt brown toned blush shade a 2 or 3 shades darker than your skin tone. 

What products would you recommend?

Mac studio fix powder (get 2-3 shades darker than your natural skin tone), Sleek contour kit (comes in 3 shades and includes highlight!), Mac Harmony matt blush, Bourjois chocolate bronzer.

Sannas top tips & tricks for contouring

I contoured my bottom lip, cheekbones, eye socket, temples, jawline, neck and nose.

  • Use a light hand!  We don't want a harsh line where we are going to contour which is going to be such a pain to blend out and just end up looking so false!
  • Use buffing circular motions with your brush- When contouring the cheeks or temples using round motions with your brush this will prevent that harsh line and it will allow us to blend as we go along.
  • Follow your natural shape- don't try and contour to make your face appear so dramatically different! Just stick to your natural contours of the face and build on that to make them appear more distinctive. Going too over the top will just lead to a big mess!
  • In my opinion, never use a shimmery contour colour- Contour is going to create a shade which is why we need a matt colour- a shimmery colour defeats the purpose, you will just end up looking like a glitter ball! I think subtle shimmer is okay, only if your going for a natural contour look.
  • Spend time blending- Its worth it! For the eye sockets one of my tricks is winging the contour shade out to elongate my eyes, and apply the colour slightly above my socket to make my lid space appear larger.
  • Use soft brushes! I love the real techniques contour brush for my face and for my eyes and nose I love any tapered but fluffy & soft eyeshadow brush thats going to blend the colour out so nicely.
  • Use your finger to blend out that contour line! For my nose especially I create two lines going down each side of my nose to slender it and then I simply use my finger and run this on top of the line once or twice and it blends it out perfectly!
  • Don't use too much product on your brush! You will either get loads of fallout or a really dark line which is such a pain to blend and will look odd.
  • Use small even strokes applying the same pressure- You don't want a wonky line and this technique will help you get a straight line that will allow you to blend really easy after!
  • Practise- You need to practise to get it perfect. Practise a more natural contouring look first, then learn how to go dramatic with it and how to build it up which will look great on special occasions or events.


Good Luck with contouring, I hope you learnt something!

 Let me know how it goes in the comments below


Love Always 


xxx


Sanna

Sunday, 2 September 2012

Twiggy eyes in 5 minutes

I thought I would do a 1960s inspired look and was obviously inspired by the gorgeous Twiggy!
Her makeup was done to make her eyes appear round and almost droopy looking.


I created this eye makeup look in 5min- I only did one eye and I didn't do the face makeup because it was just a quick trial before bed, but nevertheless I think you guys will like it and you should try it at home.

All you need is 2 eyeshadows

A matt Black and white simple as that!

I used the matt black shade from the sleek storm palette and I used Illamasqua intrigue matt blush for my white. Both super pigmented powders that blend a dream!


Step 1 is prime your eyes or apply a white eyeshadow base. We want our white to really show up true to colour on our lids. Apply your white eyeshadow all over your lids and in the inner corner as a highlight and just a little underneath the lower lashline to highlight that too.

Step 2 is to draw a black curved line following the crease of your eye. Remember to apply this just above your natural crease line because we want our lid space to appear larger and this will create the illusion of that. Do this using a small angled brush and looking down into a mirror. If you have a steady hand go across with the black eyeshadow, if not use small strokes to get the straight line. Go over the line if you don't get it perfect. Remember you can always use a sharp eyeliner pencil if you find this easier or a liquid liner- but make sure it is matt!

Step 3 is using a small smudger brush, small domed brush or pencil brush, go above this black line with black eyeshadow. Make sure you don't blend the black line we created because we want this harsh. Don't wing the shadow out because we want to create the illusion of big oval eyes. Then take your white shadow and apply this on your browbone going slightly into the black just to blend the tops out.

Step 4 is to take gel liner and create a thick line on the top of your lid really close to your upper lashline. I created a tiny wing you can do this too-but you don't need to do this because we don't want to stretch the eyes out. I took my liner in the inner corner and did a point to add my own twist. Twiggy actually did her liner going downwards on the outer corner to create the illusion of droopy eyes- she did take her liner in the inner corner but she didn't connect it to the lower lashline like I did.

Step 5: Take your black shadow and trace on your lower lashline. Apply thick double lashes on the top and thin defined lashes on the bottom by flipping them over so the outer corner is at the end of your eye- make sure you pop them under your natural lower lashes so you don't ruin your lashes!

Your done! Leave questions and thoughts in the comments below


Love Always 


xxx

Sanna